After Effects - Week Two 06.10.16
This week I was introduced to Adobe After Effects. It is a tool for creating digital visual effects and motion graphics using image compositions. It can also be used as a post-production process of film-making and television productions. The following information illustrate the key things learnt and the process undertaken.


Tutorial 01
Its setup is very similar to Photoshop and even works natively with psd files, keeping all of their layers intact after the import. The tutorials showed us how to transform layers from Photoshop and how to use the key-frame system to present these transformations over time. The stages to the tutorial were:
- Start 'New Composition'.
- Use standard definition suitable for screen size (PAL D1/DV Widescreen)
- Use 25 frames/sec (standard UK frame rate)
- Import 'Archigram_Layers' file and unpack the folder in the project window to view layers.
- Record the initial position of the balloon layer by inserting a key-frame using the icon left of the transform tools.
- Move the timeline to the end of the animation.
- Position the balloon in the its final location. Scale and rotate as desired.
- Insert a second key-frame.
- Animate the spotlight using the same techniques as for the balloon.
- This time I used the graph editor to adapt the way the spotlight behaves and changes direction. I created a softer transition form frame to frame.
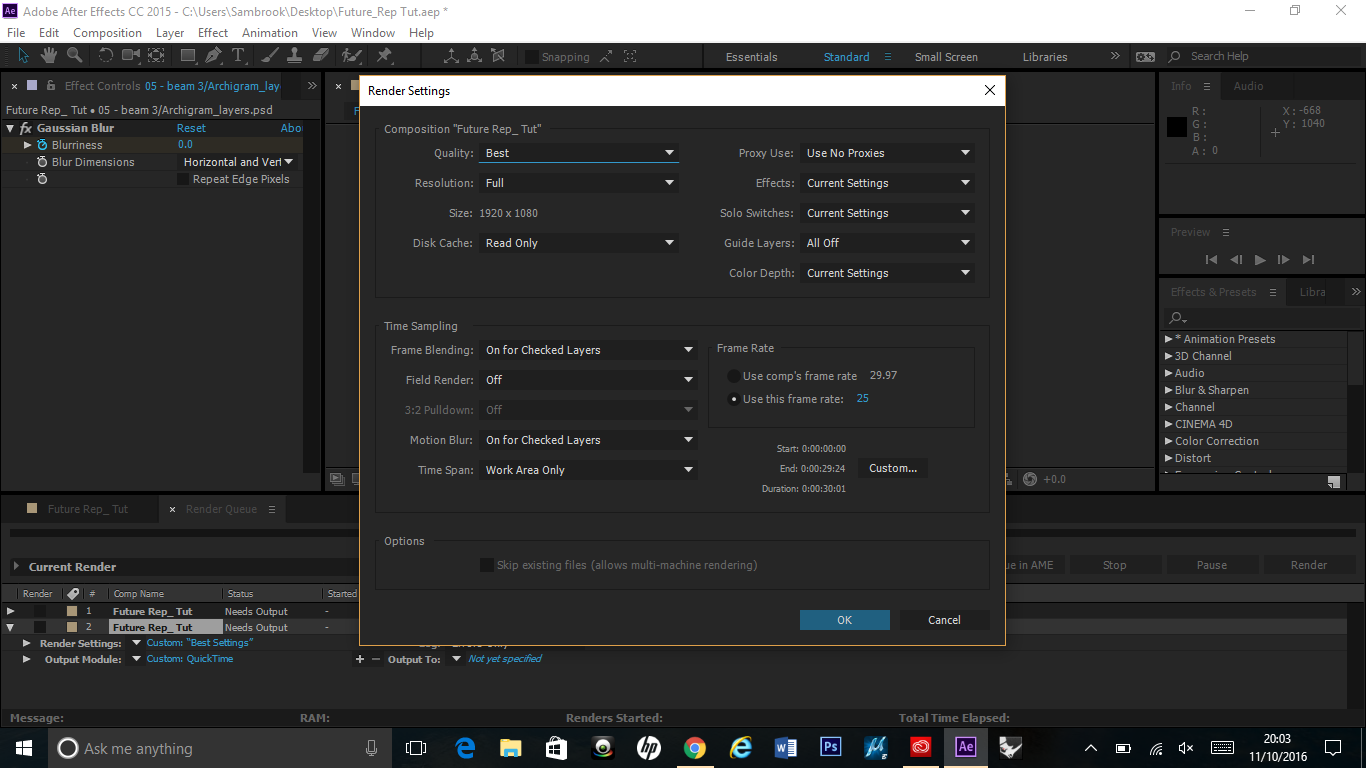
- Export - Add to render queue (set frame rate to 25/sec, Lossless Format Options-Video Codec H264).
- Press Render


Tutorial 02
The second exercise demonstrated how to use the 3D editor in after effects. Most of the work went into preparing the file. We separated each aisle and roof beam from the supermarket image to allow us to give the illusion of depth in the final animation. Steps for tutorial below.
- The layers of the image were created in photoshop using a green background for clarity. Re-Name for ordering in After Effects.
- The psd. file was opened in After Effects as before and dragged into the timeline.
- Ensure layers are ordered correctly.
- Create a camera. (Layer> New> Camera). 35mm settings.
- Each Photoshop layer was positioned in front of a camera and scaled so that the image looked as it did before editing. We could then make a fake perspective in the animation.
- By moving the position of the camera, we could make it look like a three-dimensional space.
- A depth of field blur effect was added followed by a camera jitter using the 'wiggler' tool.


